An Introduction to Displaying Web Pages - Part 2
The purpose of this article is to continue the web page display intro lesson started in the last article. In this lesson, we will dip our toes into the CSS mentioned as well as a touch of JavaScript. We will also introduce a new tool for the arsenal - the browser inspector.
Where we left off
When we left off last time, we had the code as seen below in our index.html file, and we were able to click the Go Live button to make live changes. Let us start by going live again, so that we may see changes as they happen.
1<!DOCTYPE html>
2<html>
3 <head>
4 <title>My first page</title>
5 </head>
6 <body>
7 <div>
8 <h1>My first Title</h1>
9 <p>My first random paragraph</p>
10 </div>
11 <div>
12 <h2>Bullet List Header</h2>
13 <ul>
14 <li>First</li>
15 <li>Second</li>
16 <ol>
17 <li>Indent One</li>
18 <li>Indent Two</li>
19 </ol>
20 </ul>https://github.com/tisdadd/practical-programming-web-buttton/
21 </body>
22</html>
23

If you have left it running from last time, but lost the page, you should be able to get to it through the browser site http://127.0.0.1:5500/index.html - updating the 5500 to whatever is next to the word Port where the Go Live button is otherwise placed. Or, you may use http://localhost:5500/index.html - localhost is an alias for your computer on the network, usually represented as an ip address by 127.0.0.1.
Get some color
Once you have the live reload ready, we will start adding some styling to see what happens. First, we will do it directly on the web page by placing the following tag into the head tag.
1<style> 2 div { 3 background-color: black; 4 color: white; 5 } 6 ul { 7 background-color: purple; 8 color: yellow; 9 } 10 h1 { 11 color: lightgreen; 12 } 13 h2 { 14 border-color: red; 15 border-style: solid; 16 border-width: 3px; 17 } 18</style> 19
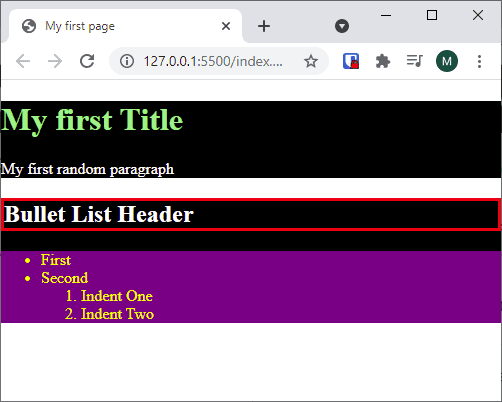
Making the page look something like this.
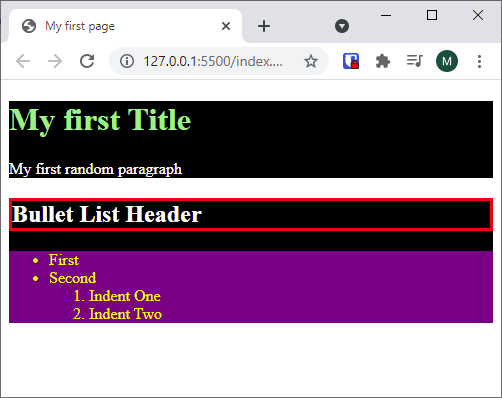
With this we will see several things, one of which may be that while bold colors make it easy to tell what is happening visually some combinations are something you may not want look at for long periods of time. But, in seriousness, we can see that the code we entered inside of the style tag matches the tags on the document, and made changes there. The basic form of CSS Styling is as below.
1selector { 2 style-property: style-value; 3 style-property-2: style-value-2; 4} 5
In our example, the selector was directly an HTML tag, later we will make some more complicated ones.
We can also observe that html tags inside of another tag can have the value passed down, that text colors are given by the color style property, and background colors are given by the background-color style property. We also notice that there is some extra blank space around things that we did not place there. Finally, we can see a red square for a border that we made using three properties to create, border-color, border-style, and border-width.
Other resources for CSS Syntax
If you wish to see another brief explanation of this syntax right now please check W3 Schools, or for a longer technical description the Mozilla developer pages.
Push to GitHub
At this point, we have something working so it is good to push it to GitHub as covered in the last lesson. I am using the commit message, "Added some style".
Figuring out the blank space
Next, we will investigate what is going on with the extra white space in between the div tags through the Chrome DevTools used for debugging. We will do so by right clicking the area that we are curious about, then clicking Inspect. There are several short cuts go get to the overall page, including f12, but since we are curious about the particular space we will check it out through the right click menu.
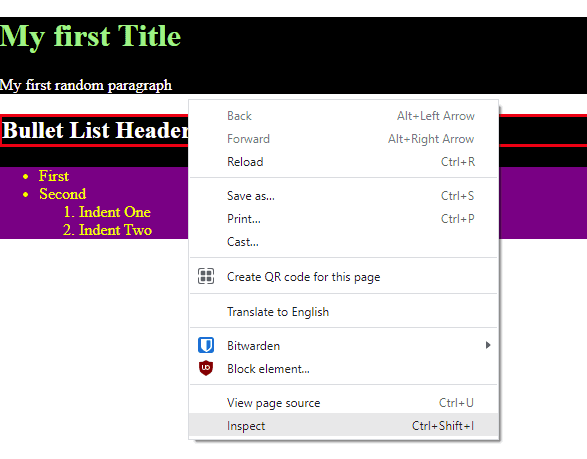
After opening it, you should notice a screen similar to the following.

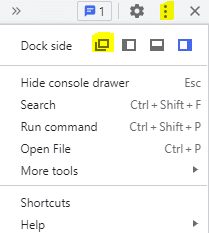
It looks like we have the body tag selected. You may right click and inspect another part to see the highlighted tag move there, confirming the suspicions. I use this menu enough that I like to click the ellipsis and change Dock side to be its own window.
Anyway, while the <body> tag is selected, you will notice a few things on the right hand side of the window. This includes an _element.style section, a body section with the addition heading user agent stylesheet and a bunch of boxes with some numbers in the center and going out from there the words padding, border, and margin. We can see that the margin currently lines up with the margin property on the body selector from the user agent stylesheet. By clicking in the element.style curly brackets, we will be able to edit it directly. Why don't we try editing it to see if we can adjust that margin? Type in margin for the CSS property name, then tab to put 0px for the value.

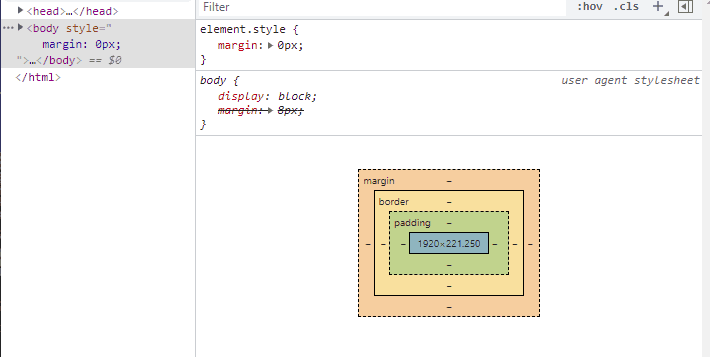
We should see a few things happen - in the browser window we see the excess white space disappear on the sides of the page. In the Inspection window, we see the body selection margin get crossed out in the user agent stylesheet, and the tag in the HTML has something new added style="margin: 0px". The crossing off is used to signify that a new style has taken priority, specifically the one attached directly to the tag. Additionally, if we hover over the element.style margin selector, a checkbox appears that we can use to toggle it on and off to see the changes quickly.
We also notice that the white space is still there between the two sections. As such, we will try a new approach. The inspector has an icon of an arrow over a box, we will click that to allow clicking on an element to select it, in addition to highlighting the whole section the element is taking up when hovering over it on the screen. You may also use Shift+Ctrl+C to toggle this mode. By hovering over things on the page, we discover that the <h2>Bullet List Header</h2> area has some extra area poking up.
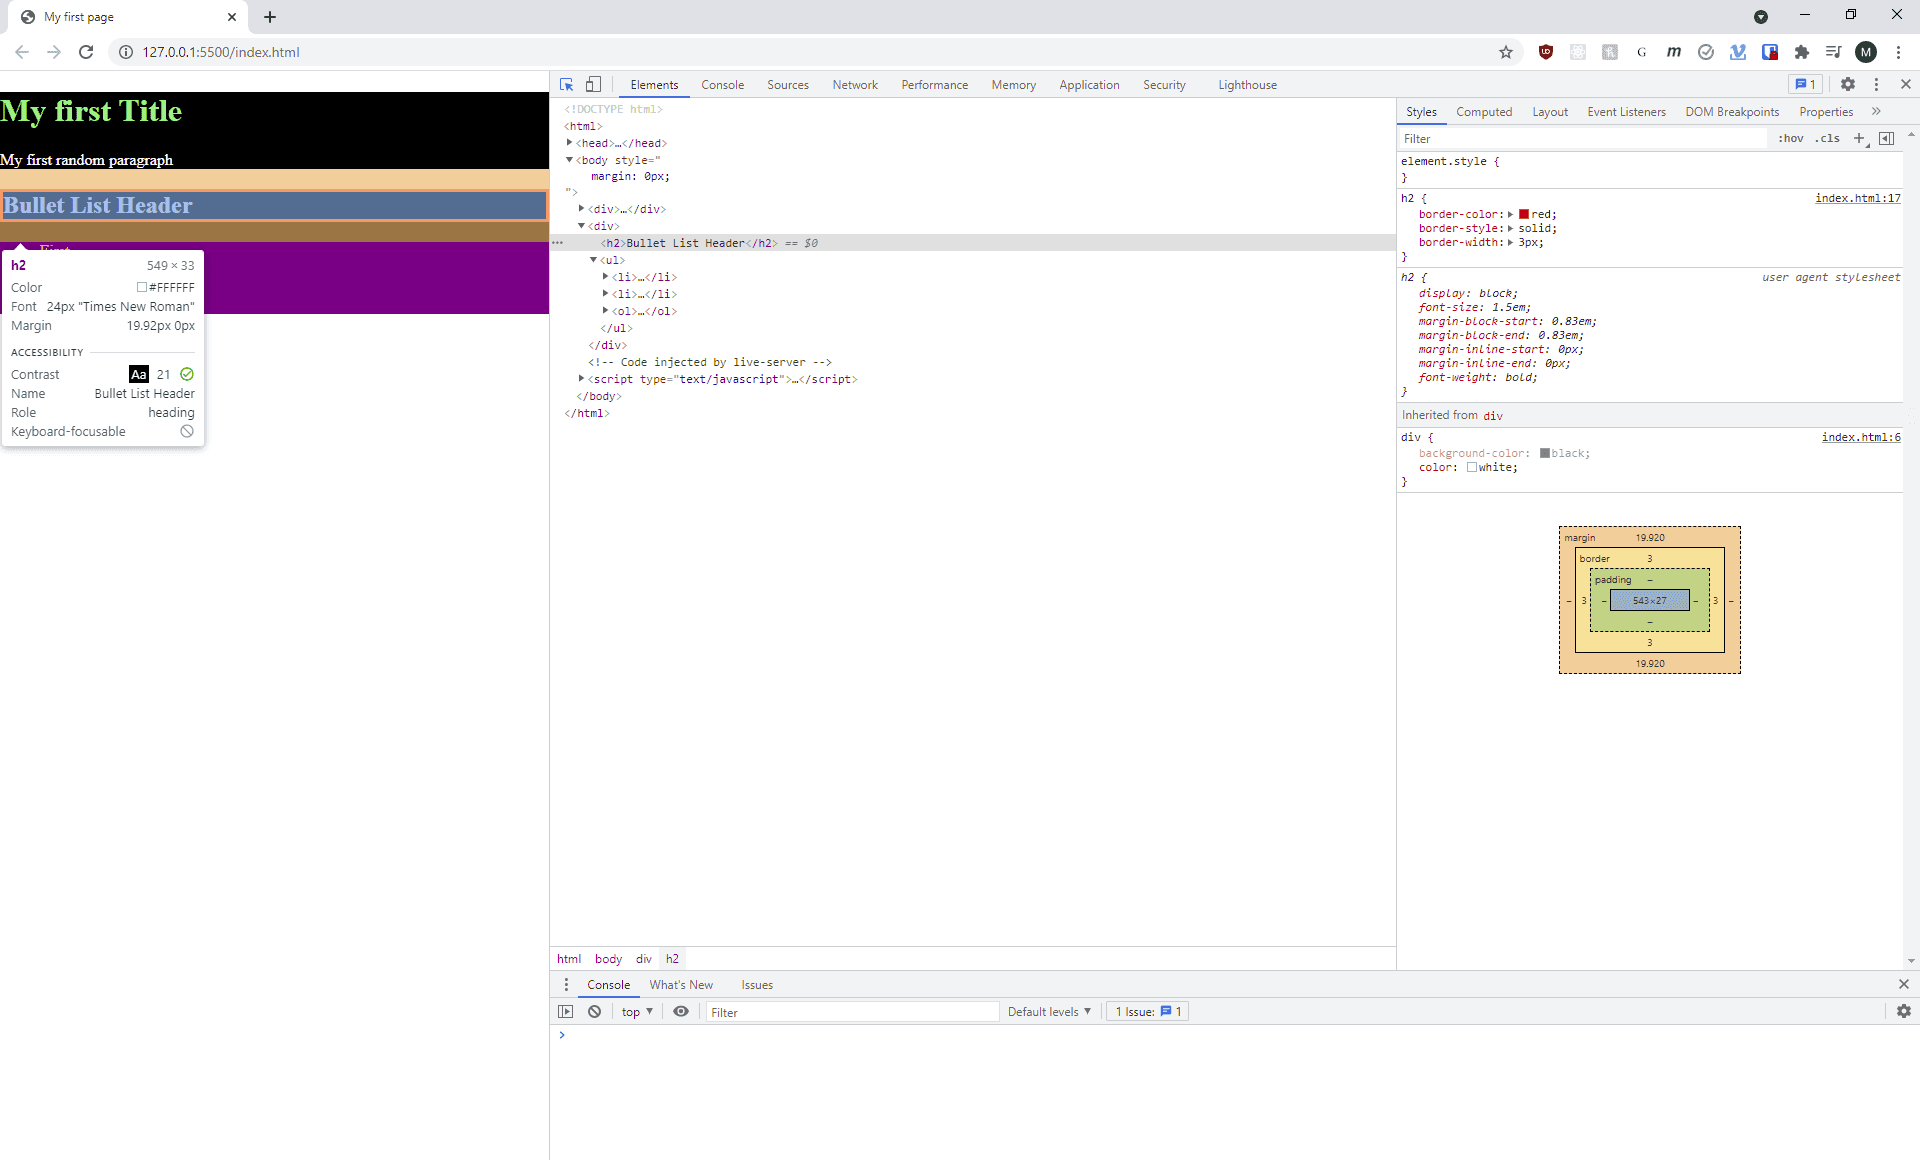
We once more find that the margin is there in the rectangles showing it, and can see that it goes past our red border. Again, edit element.style to have the property margin with value 0px, and yet still find white space. So, we keep looking and see that the paragraph has it happening as well. After updating it too, we finally have no white space between our sections. However, there is still some on the top and bottom of the page.
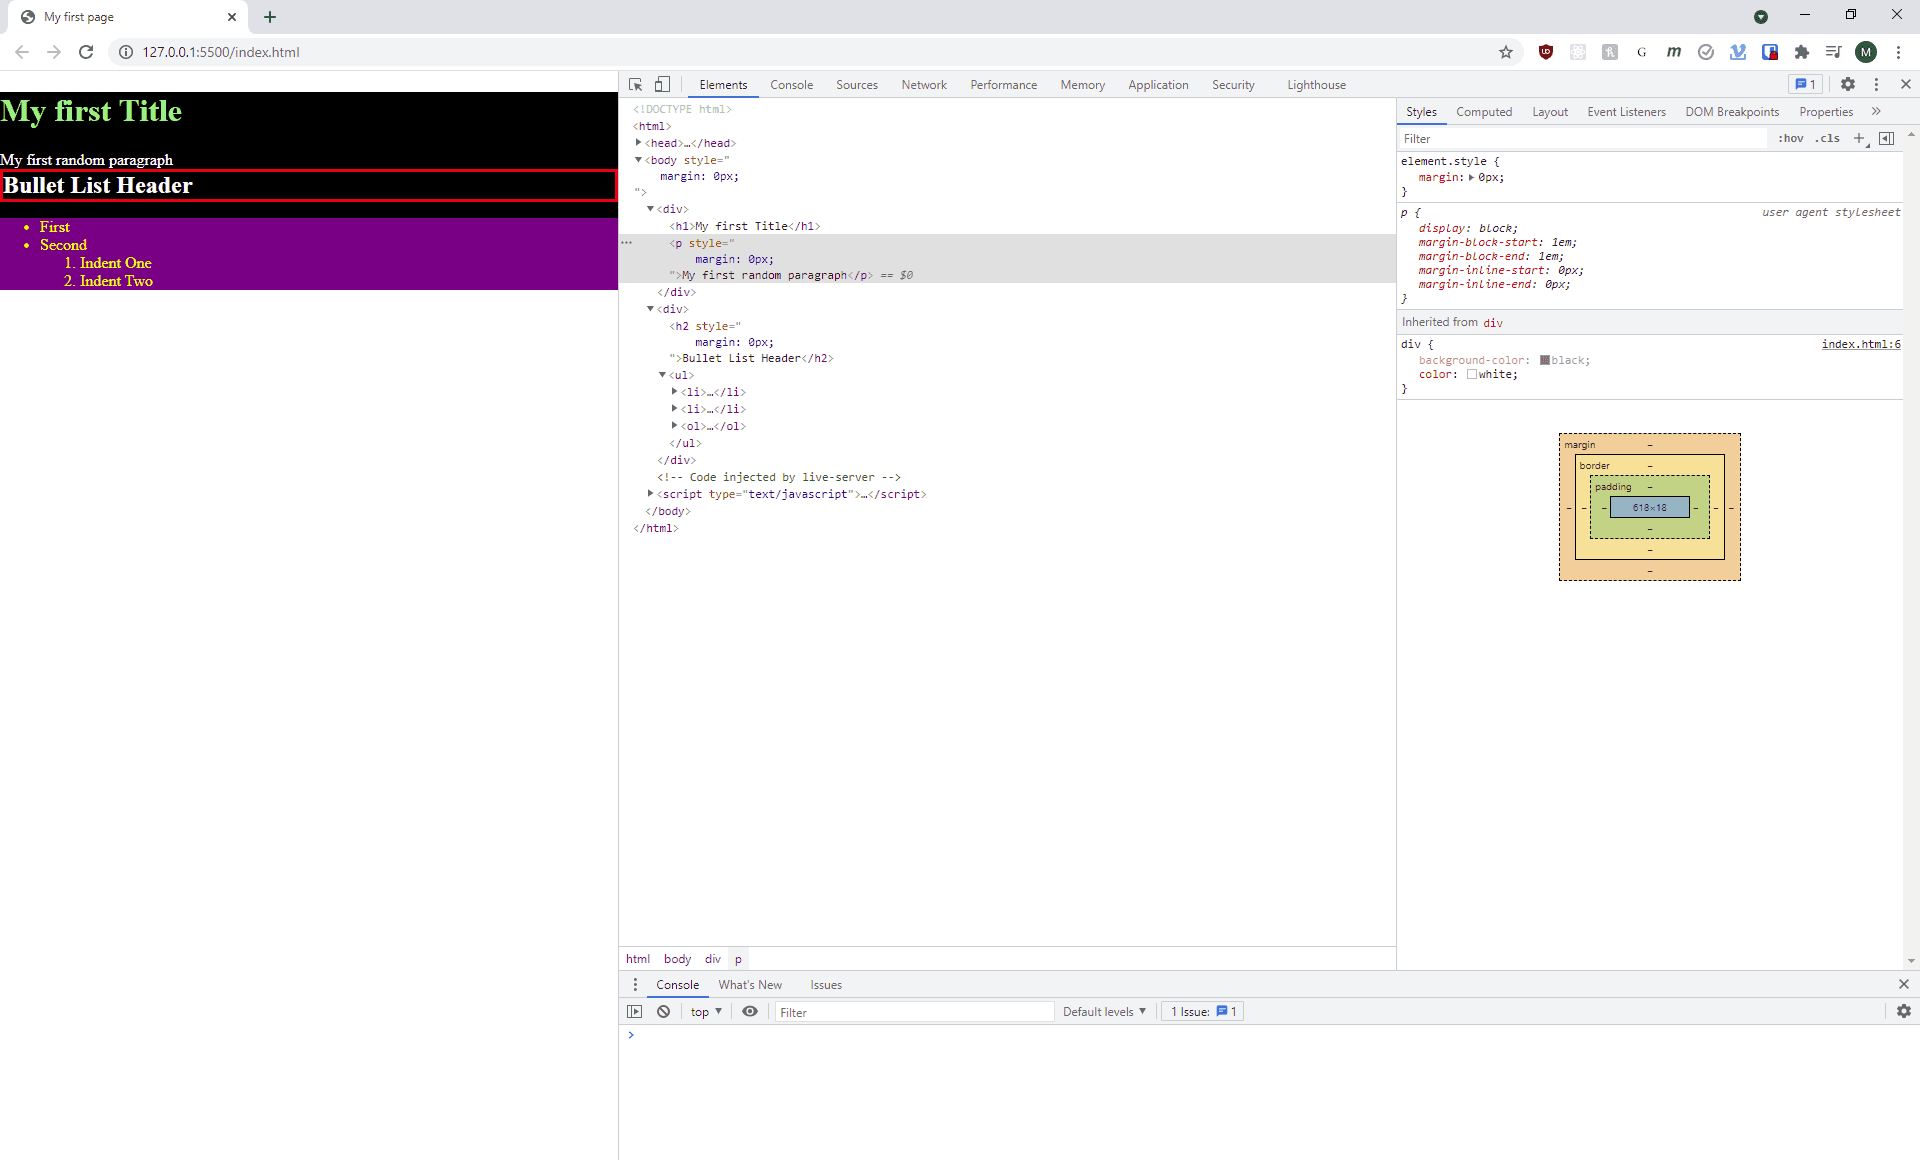
We refresh the page and see everything went back to how it was, with the spacing. That is a small part of what makes the web tools useful, as you do not need to worry about messing up your core code - though it is important to keep track of your changes in case you need them in the core code. However, you may be wondering if there is a way to easily remove margin for everything and start from scratch - after all, it is your web page, why is this user agent stylesheet changing it. Not to worry, in our style tag from earlier, we can add the following and save.
1body, 2body * { 3 margin: 0px; 4} 5
This will make everything's margin need to be dictated by you, the developer. This selector says to do these rules to the body as well as every element inside of the body. You may also inspect one of the ordered list items to see a lot of styles being applied all at once.
Add some JavaScript
You may have noticed in the inspector window a comment tag saying <!-- Code injected by live-server --> followed by a <script> tag. This is one way JavaScript gets placed in directly at page level, and we will add our own now. There are several ways to do it, but we will start with this tag inserted directly above the closing </head> tag.
1<script> 2 console.log('abc') 3</script> 4
Now, in the inspection window, you should be able to click console and see the letters "abc" that the JavaScript put in. While not that exciting, it has allowed you to do something with JavaScript and see some results. We will do more complicated things in later lessons, but this introduced a little bit of syntax, and a way to show it loading. If you want more interactivity, try changing "console.log" to "alert".
As we have made a few changes, we should push to GitHub again.
1git add . 2git commit -m "Zeroed Margins and Added some JavaScript" 3git push 4
Conclusion
In this lesson, we added some styling to the page that we made last time, and started exploring the Chrome DevTools inspector. We introduced some CSS properties and selectors, and made something happen with JavaScript. You may view the current code on GitHub or StackBlitz
Next - Web Page Interactive Button
Prior - An Introduction to Displaying Web Pages
Tags: Practical Programming, Introduction, HTML, Git, CSS, Web Page, JavaScript